Difference between revisions of "Dreamcast Teardown"
Jump to navigation
Jump to search
(→Step 2) |
(→Detach the power board) |
||
| Line 14: | Line 14: | ||
|} | |} | ||
| − | ==Detach the power board== | + | ==Detach the power board and switch== |
{| style="width:70%;" | {| style="width:70%;" | ||
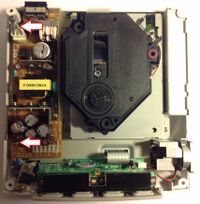
| Unplug the power switch from the power board and remove the two screws shown in the picture. The power board connects to the motherboard through a 6-pin port on the end closest to the controller ports. Grip the board at this corner and gently pull it up and off the pins, which are physically part of the motherboard. The pins are firmly attached and require you to use some force to free the board. | | Unplug the power switch from the power board and remove the two screws shown in the picture. The power board connects to the motherboard through a 6-pin port on the end closest to the controller ports. Grip the board at this corner and gently pull it up and off the pins, which are physically part of the motherboard. The pins are firmly attached and require you to use some force to free the board. | ||
| [[File:dreamcast_teardown_03.jpg|200px|right]] | | [[File:dreamcast_teardown_03.jpg|200px|right]] | ||
| + | |- | ||
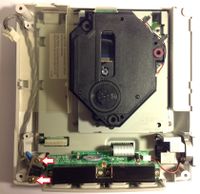
| + | | The power board is insulated from the RF shield by a piece of plastic it rests on. The plastic piece comes out easily, but don't forget to put it back when you put everything back together, or you could really fuck up your Dreamcast. Then unscrew the power switch and put it aside. | ||
| + | | [[File:dreamcast_teardown_04.jpg|200px|right]] | ||
|} | |} | ||
Revision as of 02:48, 3 March 2014
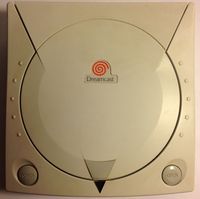
| This is a guide for disassembling a Sega Dreamcast. Click on any of the images for a larger version.
You will need the following tools:
|
Open the case
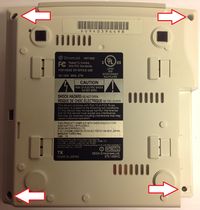
| The Dreamcast's shell is held together by 4 screws, one on each corner. One is hidden by the modem, so remove that if you haven't done so already. Flip the console over, and lift the top off. |
Detach the power board and switch
| Unplug the power switch from the power board and remove the two screws shown in the picture. The power board connects to the motherboard through a 6-pin port on the end closest to the controller ports. Grip the board at this corner and gently pull it up and off the pins, which are physically part of the motherboard. The pins are firmly attached and require you to use some force to free the board. | |
| The power board is insulated from the RF shield by a piece of plastic it rests on. The plastic piece comes out easily, but don't forget to put it back when you put everything back together, or you could really fuck up your Dreamcast. Then unscrew the power switch and put it aside. |


