Difference between revisions of "Atari 7800 Teardown"
Jump to navigation
Jump to search
| Line 1: | Line 1: | ||
| + | [[File:Atari_7800_teardown01.jpg|200px|right]] | ||
| + | |||
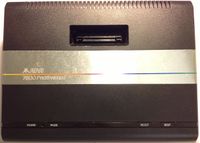
This is a guide for completely disassembling an [[Atari 7800]]. | This is a guide for completely disassembling an [[Atari 7800]]. | ||
Revision as of 00:11, 24 January 2014

This is a guide for completely disassembling an Atari 7800.
You will need the following tools:
- A large Phillips-head screwdriver
- A small pair of pliers
- A small, sturdy (i.e. difficult to bend) flathead screwdriver for bending hard-to-reach metal tabs
Step 1 - Open the case
Flip the console over and remove the 5 screws on the bottom. Turn it back over and lift the top off. The top should come off effortlessly.
Step 2 - Remove the motherboard from the case
Step 3 - Remove RF shield
Fully exposing the motherboard can be somewhat time consuming. The board is partially encased by an RF shield consisting of top and bottom halves that interlock using several metal tabs, which are bent to prevent the halves from detaching. There are 14 metal tabs, and you'll have to straighten each one to remove the shield.